Impress White Smooth Faux Wooden Blinds – With/Without Tape
Impress White Smooth Faux Wooden Blinds – With/Without Tape
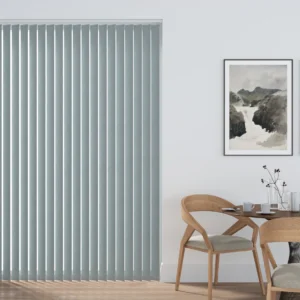
The most popular choice for wooden blinds is the classic white wooden range. These faux wood blinds are both stylish and practical, making them suitable for any home.
Easy to tilt or open using the cord control
Excellent control over light and privacy
Our top-selling faux wood slats are made from high-quality, flame-retardant PVC. They are also resistant to moisture, which makes them ideal for kitchens and bathrooms.
Express Service
This product is eligible for our Express Service. If you choose this option, your order will be prioritised in production and dispatched the same day.
Available on orders placed before 12 noon, Monday to Friday (excluding public holidays).
Orders placed after 12 noon will be sent the next working day.
Items not available for the Express Service will be shipped separately within the stated delivery times.
€ 29.80
Tools You Will Need
A steel measuring tape
A pencil for marking and writing measurements
A worksheet to record your findings
A ladder for tall windows, if necessary
Tips for Accurate Measurement
Do not confuse height and width, as swapping them may result in a blind that does not fit.
If measuring more than one window, do not assume all measurements are the same. Measure each window individually, as small differences can affect the fit.
Measuring for Outside Recess
Measure the exact area you want the blind to cover. To reduce light leakage, it is recommended that the blind overlaps the window by at least 70mm at the top and 50mm on each side.
Overlap at the bottom is optional but consider obstacles such as radiators.
Use a metal tape measure. Cloth tapes may stretch or bend, giving inaccurate measurements.
Measuring for Inside Recess
Measure the full width and height of the recess if you want the blind to fit inside the window. We will make the necessary deductions to ensure a perfect fit.
Take measurements in three different places for both width and drop, and use the smallest measurement.
Do not make any deductions yourself; we will adjust the blind for a perfect fit.
Use a metal tape measure for accuracy, as cloth tapes can stretch.
Equipment Included with Your Vertical Blind
Top fix brackets × 2
Face fix brackets × 2
Hangers × 1
Allen key × 1
Stabilising chain × 2
Safety hook × 1
Wood screws × 4
Weight × 1
Pencil, drill with suitable bits, screws, crossed-head screwdriver, metal tape measure
Face Fix Installation
Position the brackets about 5cm from each end of the headrail. If more than two brackets are supplied, space the extra brackets evenly along the length of the blind. Ensure the fixings are suitable for the wall or surface you are mounting to.
Hook the back of the headrail into the bracket and rotate it into position. Secure the headrail by tightening the short screw at the front of the bracket.
Top Fix Installation
Measure and mark the area, allowing space for obstacles like window handles. Position the brackets about 10cm from each end of the headrail. If there are more than two brackets, space the extra ones evenly. Make sure the fixings are appropriate for the mounting surface.
Tilt and hook the headrail into the bracket, then rotate it until it clicks into place. To release the headrail, press the bracket at the designated point.