MAGGIE OCHRE

MAGGIE OCHRE

Please make sure you provide your exact wall-to-wall measurements for both the width and the drop of your roller blinds. Our warehouse team will then make the required adjustments for you. Orders cannot be dispatched until your measurements have been received.

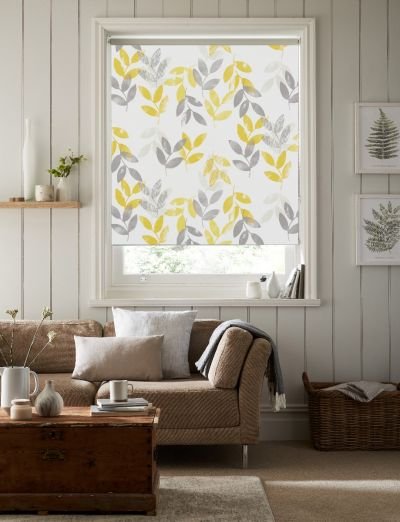
Our roller blinds are designed with a natural weave effect, adding a touch of style and elegance to any room in your home.

  • Every blind is handmade in our UK-based workshop.
  • Fast service with quick dispatch – your blind will be sent out on the next working day once it has been manufactured.
  • Each blind is made using premium materials and strong components, including an aluminium roller tube, steel brackets painted in white, and a durable white side-winder chain.
  • Smooth and reliable operation with an easy-to-use side chain control system.
  • Fabric is 100% polyester and comes with thermal properties for added comfort.
  • Fitting is simple and straightforward, though instructions are not included.
  • Supplied with universal brackets that allow for flexible fitting options.
  • A child safety clip and chain connector are included with every blind.

Important Notice: Please note that colours may appear differently depending on your computer, phone, or tablet screen settings.

When you receive your roller blind, the parcel will contain:

  • The roller blind with its operating mechanism.
  • A set of universal fitting brackets.
  • A child safety clip.

 16.26


Total Price:  16.26

Inside Recess Measuring (Fitting inside the window frame)

If you want your roller blind to fit inside the window recess, you will need to measure the exact wall-to-wall width and height of the recessed space.

  • Measure across the inside width of the recess at three points – top, middle, and bottom of the window.
  • Measure the height in three places – left, centre, and right sides of the window.
  • Always use the smallest measurement for your order to ensure the blind fits neatly.
  • We recommend using a steel measuring tape for accurate results (never a cloth tape, as it can stretch).
  • The factory will make the small industry-standard deductions necessary to ensure a precise fit.
  • Be mindful of obstacles such as handles, tiles, or rails when measuring to make sure the blind has enough clearance.

Outside Recess Measuring (Fitting on the wall outside the window frame)

If you prefer the blind to sit outside the recess, measure the full width and height of the area you want the blind to cover.

  • We suggest allowing an overlap of at least 6 cm on each side and 7 cm at the top of the window to minimise light seepage.
  • The overlap at the bottom is a matter of personal choice.
  • Be careful to measure around any obstructions such as tiles, radiators, or window rails.
  • In this case, the blind will be made exactly to the size you provide, with no deductions.

You can choose one of two mounting options: top mount or face mount.

  • Top Mount: This involves fixing the blind to an overhead surface such as the ceiling or the top of the window recess.
  • Face Mount: This means fixing the blind to the front-facing surface, outside the window frame.

When fitting, position the brackets so that the blind operates freely without coming into contact with handles or frames. To do this, loosely fit both brackets onto the blind and place it in the desired position to get an idea of where the brackets should go. This will help with centring the blind before drilling.

  1. Place the control side bracket on the same side as the chain mechanism. Mark the first bracket position carefully, ensuring it is level. Drill the holes and fix the bracket securely, using wall plugs if required.
  2. Insert one side of the blind into the mounted bracket. Then position the other bracket on the opposite end, ensuring it is level with the first. Mark, drill, and secure this second bracket into place.

Mounting the Blind

  • Insert the pin end of the blind into the pin side bracket. This pin has a spring action, which helps when mounting and removing the blind.
  • Insert the control mechanism into the control side bracket. Ensure the central lug on the mechanism points downwards and locks into the cross-section of the bracket. Once in place, hook it securely.

Operating the Blind

Once installed, the blind is operated using the side chain. Simply pull the chain to raise or lower the blind smoothly.

Child Safety – P-Clip

Every blind comes with a safety device known as a P-clip.

  • This clip must be installed at the maximum possible distance from the control mechanism. This prevents the chain loop from hanging loosely and becoming a hazard.
  • Ensure the chain is fitted inside the P-clip and kept under constant tension.
  • Screw the device securely to the wall so that the chain remains tight and safe at all times.